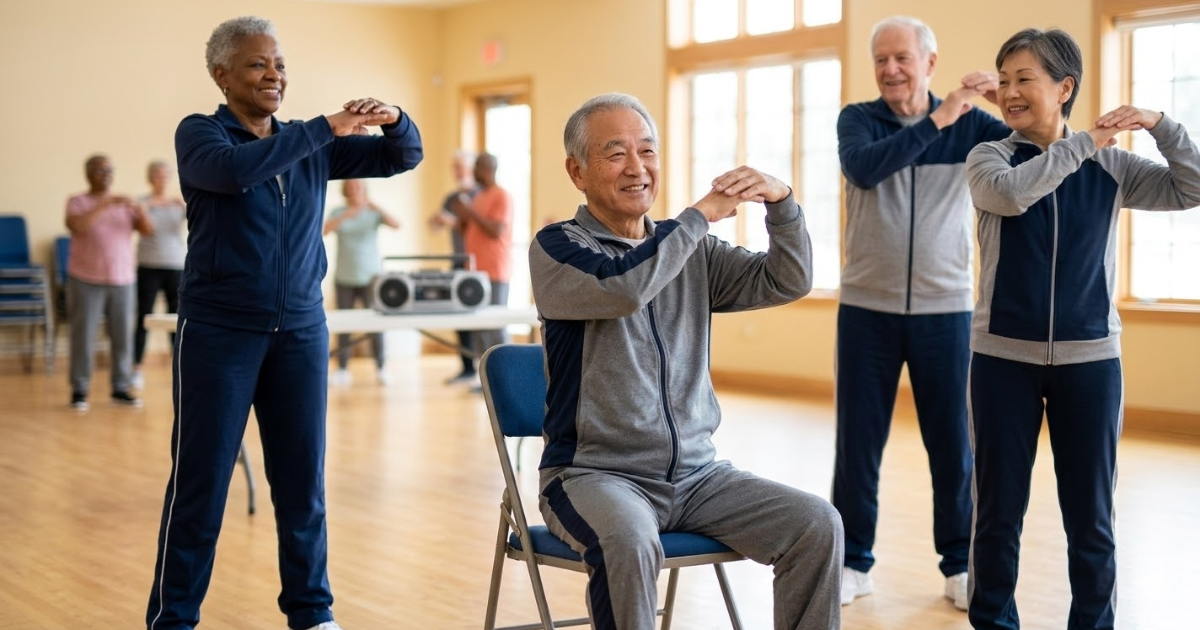
Low Impact Home Workouts for Joint Pain Seniors: The Complete Guide to Moving Without Fear

A Note Before You Begin: This article is for general educational purposes only and is not a substitute for professional medical advice. Please speak with your doctor or physical therapist before starting any new exercise program, especially if you live with arthritis, osteoporosis, or a recent joint injury.
There is a particular kind of quiet grief that comes with joint pain. It is not the dramatic pain of an injury. It is the slow, creeping kind — the moment you realize you have stopped taking the stairs two at a time, stopped kneeling in the garden without bracing yourself first, stopped saying “yes” to a walk around the block because your knees will remind you of it for the rest of the day.
If that sounds familiar, you are not alone, and more importantly, you are not out of options. Millions of adults over fifty live with some form of joint discomfort, whether from osteoarthritis, old injuries, or simply the natural wear that comes with decades of a life well lived. The instinct is often to rest, to protect the joint by moving it as little as possible. But here is the truth that modern physical therapy has confirmed again and again: the right kind of movement is one of the most powerful tools you have for reducing joint pain, not increasing it.
This guide was written for you — the person who wants to feel strong and steady in their own home again, without gyms, without fear of “overdoing it,” and without complicated equipment. Every exercise here is low impact, meaning it is gentle on the joints while still building the strength, flexibility, and balance that protect you from further pain and injury. Grab a sturdy chair, a comfortable spot near a wall, and let’s begin.
What follows is not a quick fix, and we want to be honest with you about that from the very first page. It is, instead, a complete framework built specifically around low impact home workouts for joint pain seniors: the science behind why gentle movement helps rather than harms, a full library of specific exercises organized by the part of the body they support, a realistic week-by-week plan for building the habit, guidance on nutrition that complements your efforts, and clear safety signals so you always know when to push a little further and when to pull back. Read it once from start to finish if you like, or simply skip ahead to the section most relevant to you today. Either way, everything you need to get started safely is here.
Understanding Joint Pain: Why Movement Matters More Than Rest
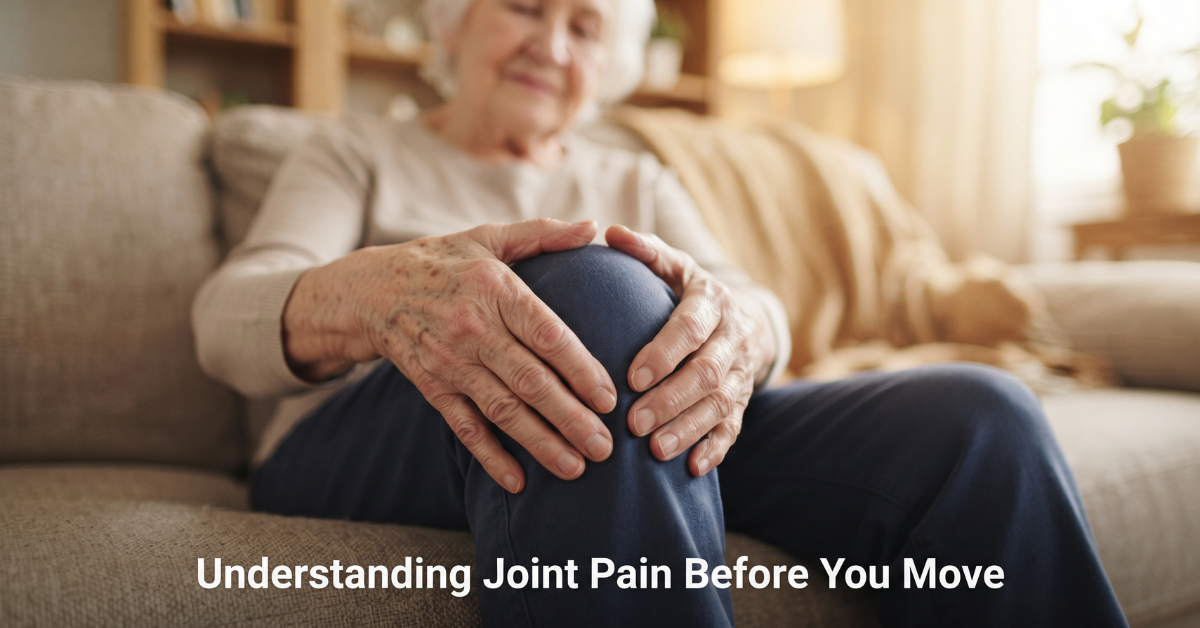
For decades, the standard advice for joint pain was simple: rest it. If your knee hurts, sit down. If your hip aches, avoid stairs. It felt logical — an injured joint should be protected, the same way you might avoid putting weight on a sprained ankle.
But joint pain in seniors, most commonly caused by osteoarthritis, behaves very differently from an acute injury. Osteoarthritis develops when the cartilage that cushions your joints gradually thins over time. Around that joint, your body relies on muscles, tendons, and connective tissue to share the load and keep movement smooth. When you stop moving a joint out of fear of pain, those supporting muscles weaken. A weaker muscle means the joint itself absorbs more stress with every step, every reach, every time you stand up from a chair. The result is a painful cycle: pain leads to rest, rest leads to weakness, and weakness leads to more pain.
Low-impact exercise interrupts that cycle. It strengthens the muscles surrounding your joints — your quadriceps supporting your knees, your glutes and core supporting your hips and lower back, your rotator cuff muscles supporting your shoulders — so those muscles do more of the work and your joints do less. Movement also increases circulation to the joint capsule, which helps deliver nutrients to cartilage and flush out inflammatory compounds that contribute to stiffness. And gentle, repeated motion keeps the synovial fluid inside your joints flowing, which is the natural lubricant that allows bones to glide smoothly rather than grind.
None of this means pushing through sharp pain. It means learning the difference between the normal, temporary discomfort of muscles that are being asked to work again, and the warning-sign pain that tells you to stop. We will cover exactly how to tell the difference later in this guide. For now, simply understand this: your joints were built to move, and gentle, consistent movement is very often the medicine, not the enemy.
The Emotional Side of Chronic Joint Pain
Before we move into the science and the exercises themselves, it is worth pausing on something rarely discussed openly: the emotional weight that chronic joint pain carries. It is not only a physical experience. It is the quiet frustration of declining an invitation to walk the boardwalk with grandchildren. It is the private embarrassment of needing both hands and a slow count of three to rise from a low sofa in front of guests. It is the low hum of worry that asks, “Is this the beginning of something worse?”
Many people living with joint pain describe feeling like their body has become unpredictable, almost like a stranger they used to know well. This can chip away at confidence far beyond the joint itself, sometimes leading to a smaller and smaller world — fewer outings, less spontaneity, more time spent seated out of caution rather than necessity. Understanding this emotional layer matters because motivation for a home workout routine rarely comes from statistics about cartilage. It comes from wanting your world to feel large again: to trust your body enough to say yes to the walk, the stairs, the grandchild who wants to be picked up.
Keep this in mind as you read on. The exercises in this guide are not simply a physical prescription. They are a pathway back to a version of daily life that feels less limited by fear and more shaped by your own choices, one small, manageable session at a time.
Why Low Impact Home Workouts for Joint Pain Seniors Work So Well
“Low impact” is a phrase used often but rarely explained. In simple terms, an exercise is considered low impact when at least one foot (or your seated body weight) stays in contact with a stable surface at all times, avoiding the jarring forces that come from jumping, running, or sudden direction changes. High-impact activities can place forces of three to five times your body weight through your knee and hip joints with every landing. Low-impact activities, by contrast, keep forces closer to your actual body weight, or even less when performed seated or in water.
This matters enormously for joint health. Research from institutions studying arthritis management has consistently found that moderate, low-impact strength and flexibility work reduces pain scores and improves function in adults with knee and hip osteoarthritis, often as effectively as some pain medications, but with none of the side effects. The mechanism is straightforward: stronger muscles act as natural shock absorbers, cartilage responds to gentle, repeated loading by staying healthier (cartilage actually needs some compression and release, like a sponge, to stay nourished), and improved flexibility reduces the abnormal joint mechanics that come from tight, guarded muscles compensating for pain.
There is also a often-overlooked benefit: balance. Falls are one of the leading causes of serious injury for adults over 65, and much of that risk comes from weakened stabilizer muscles and slower reaction times, both of which respond well to targeted, low-impact training. A workout program that combines gentle strength work, flexibility, and balance training does more than ease your joint pain today — it protects your independence for years to come.
Debunking Common Myths About Exercise and Joint Pain
Myth: “If it hurts, I should stop moving that joint altogether.” In reality, complete immobilization is rarely recommended except in the case of an acute injury under a doctor’s direct instruction. Gentle, appropriately-scaled movement almost always outperforms complete rest for chronic joint conditions.
Myth: “Exercise will simply wear down my joints faster.” This misunderstanding likely comes from confusing low-impact strength and mobility work with high-impact, repetitive-stress activities like running on pavement or competitive sports. The controlled, low-impact movements in this guide load the joint gently and briefly, which research suggests actually supports cartilage health rather than accelerating its breakdown.
Myth: “I am too old to start now.” Studies on adults beginning structured exercise programs well into their seventies and eighties consistently show measurable improvements in strength, balance, and reported pain within just eight to twelve weeks. The body retains a remarkable capacity to adapt at any age, particularly with the kind of gradual, consistent approach outlined in this guide.
Myth: “Supplements or creams alone will fix the problem.” While certain nutrients and topical products may offer some comfort, none can replace the structural benefit that comes from strengthening the muscles surrounding a joint. Think of nutrition and supportive products as one supportive layer among several, not a stand-alone solution.
Before You Begin: Your Safety Checklist
A good workout habit is built on a foundation of safety, not enthusiasm alone. Before you try any of the routines in this guide, walk through this checklist.
1. Talk to Your Doctor First
If you have not exercised regularly in some time, or if you have a diagnosed joint condition, heart condition, or recent surgery, a quick conversation with your doctor or physical therapist can help you understand which movements are appropriate for your specific situation. This single step prevents the vast majority of exercise-related setbacks.
2. Set Up a Safe Space
Clear a space roughly six feet by six feet, free of rugs that could slip, cords to trip over, or furniture with sharp corners. Use a sturdy, armless dining chair rather than a wheeled office chair. If you plan to do any standing balance work, position yourself near a wall or heavy countertop you can hold if needed.
3. Learn the Pain Scale
A helpful rule used by physical therapists is the “two-hour rule.” Mild discomfort or muscle fatigue during and immediately after exercise is normal and expected. However, if pain in a joint is still elevated two hours after you finish, or if you experience sharp, stabbing, or swelling-related pain at any point, stop the activity and scale back next time. Never push through pain that feels different from ordinary muscle fatigue.
4. Dress and Hydrate Appropriately
Wear supportive, closed-toe shoes with good grip, even indoors. Loose, comfortable clothing that does not restrict movement is ideal. Keep a glass of water nearby, and drink both before and after your session.
5. Warm Up Every Single Time
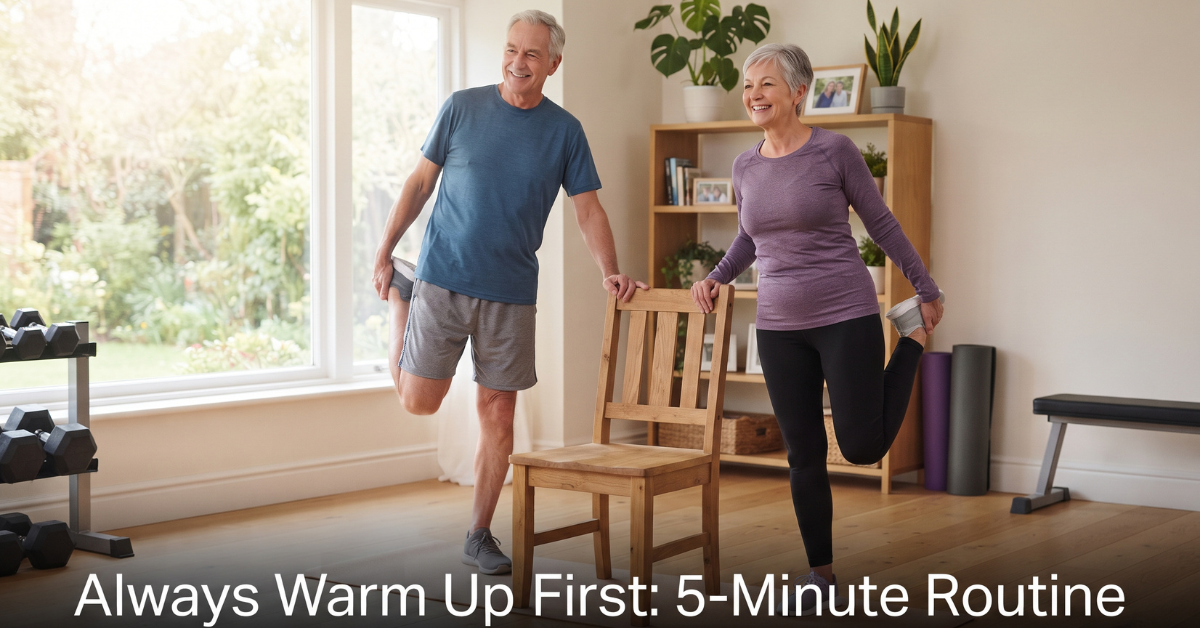
Cold muscles and stiff joints are far more prone to strain. Never skip the warm-up, even if you feel like you are short on time. It is, quite simply, the most important five minutes of your entire routine.
A Gentle Reminder About Safety Online: Many seniors now look up exercise videos, health information, and even talk with their doctor’s office through apps on their phone, tablet, or laptop — especially when using public WiFi at a coffee shop, library, or doctor’s waiting room. Unfortunately, seniors are also disproportionately targeted by online scammers and identity thieves; some studies estimate that more than 70% of scam and phishing victims are seniors, precisely because this age group is the least likely to have protective tools in place on their devices. The hard-earned monthly pension or retirement deposit sitting in your bank account is exactly the kind of target these criminals look for. Using a trusted security tool like NordVPN on your phone, laptop, or tablet encrypts your connection so your personal and financial information stays private, even on public networks. Learn how NordVPN can help protect your accounts →
The Essential 5-Minute Warm-Up Routine
Think of your warm-up as sending a gentle wake-up call to your joints, telling them that movement is coming. Perform each of the following for 30 to 45 seconds, moving slowly and with control.
Neck and Shoulder Rolls
Sitting tall, slowly roll your shoulders backward in a large circle five times, then forward five times. Follow with gentle neck tilts, bringing your ear toward your shoulder on each side, holding for a few seconds without forcing the stretch.
Seated Marching
Sitting toward the front edge of a sturdy chair, lift one knee toward your chest as high as is comfortable, lower it, and repeat with the other leg. This gently activates your hip flexors and increases blood flow through your legs without any impact at all.
Ankle Circles
While seated, lift one foot slightly off the floor and rotate your ankle in slow circles, five in each direction, before switching feet. Stiff ankles are an often-overlooked contributor to poor balance, and this small movement makes a real difference.
Standing Weight Shifts
Standing behind your chair with both hands resting lightly on the backrest, shift your weight slowly from your right foot to your left foot and back, ten times total. This wakes up the stabilizing muscles around your hips and ankles that you will rely on throughout the rest of the routine.
Once you have completed the warm-up and you feel your body is loose and your breathing is slightly elevated but comfortable, you are ready to move into the main routine.
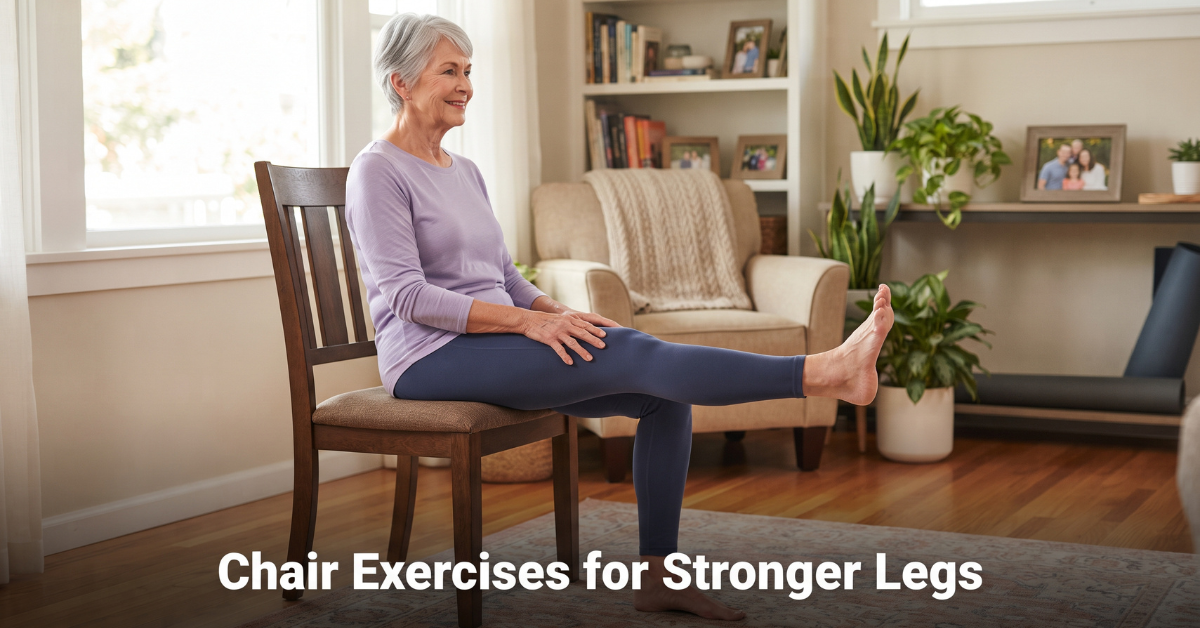
Chair Exercises for Stronger, Pain-Free Legs
Your legs carry you through every single day, and strong leg muscles are one of the single best defenses against knee and hip pain. These exercises use a sturdy chair both as support and, in some cases, as light resistance.
Seated Leg Extensions
Sit tall with your back against the chair. Slowly straighten one leg out in front of you until it is as flat as comfortably possible, hold for two to three seconds, then lower with control. Perform 10 to 12 repetitions per leg. This exercise directly strengthens the quadriceps, the muscle group most responsible for protecting the knee joint. If this feels too easy after a couple of weeks, try adding a light ankle weight of one to two pounds.
Sit-to-Stand (The Most Important Exercise on This List)
Sit at the front edge of your chair with feet flat on the floor, hip-width apart. Lean slightly forward at the hips, then press through your heels to stand up fully, using your hands on the armrests for support only as needed. Lower back down slowly and with control, rather than dropping into the seat. Repeat 8 to 10 times. This single movement mirrors one of the most physically demanding tasks in daily life — getting up from a chair, a car seat, or the toilet — and building strength here has an outsized impact on independence and fall prevention.
Seated Hip Abduction
Sitting tall with feet flat on the floor, place a soft pillow or folded towel between your knees, or simply press your knees outward against light resistance from your own hands. Hold for five seconds, release, and repeat 10 times. This targets the hip abductor muscles, which play a major role in pelvic stability and reducing hip pain during walking.
Calf Raises with Chair Support
Standing behind your chair with hands resting on the backrest, slowly rise onto the balls of your feet, hold for two seconds, then lower with control. Perform 10 to 15 repetitions. Strong calves support ankle stability, which in turn protects your knees and hips from compensating for a wobbly foundation.
Balance Training: Preventing Falls While Building Confidence
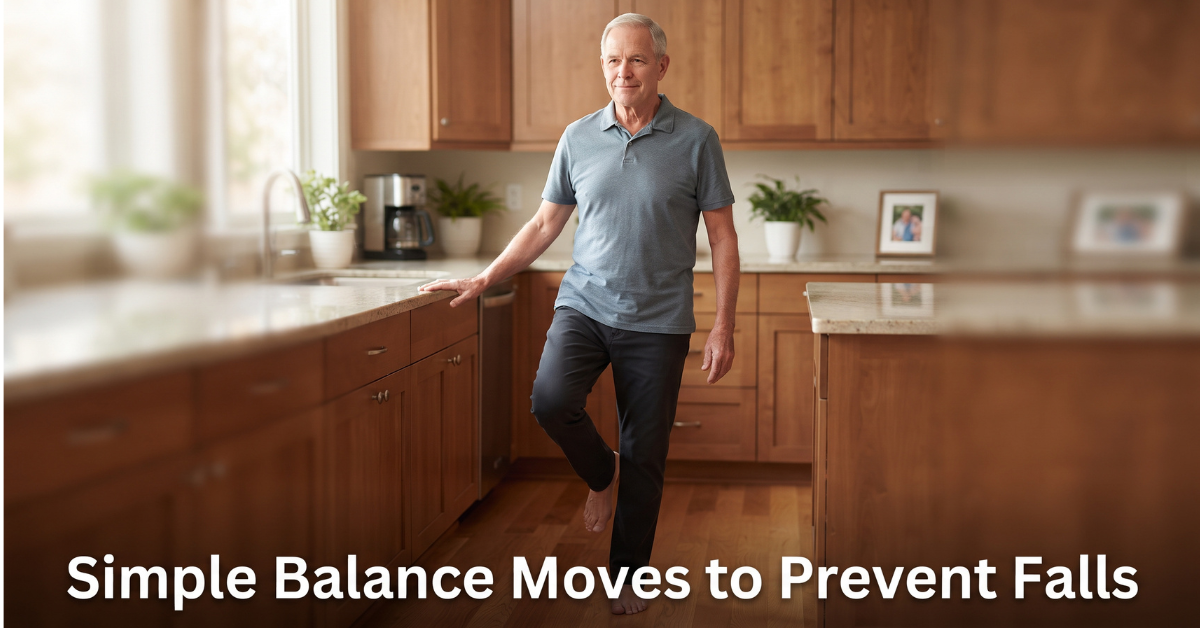
Balance is a skill, not a fixed trait, and like any skill it improves with practice. These exercises should always be done near a stable surface such as a countertop, wall, or sturdy chair.
Single-Leg Stance
Standing beside a counter with one hand resting lightly on it, lift one foot a few inches off the ground and hold for 10 to 15 seconds, then switch sides. As your confidence grows, try holding with only a fingertip of support, and eventually with your hand hovering just above the counter rather than touching it.
Heel-to-Toe Walk
Standing near a wall for support if needed, walk in a straight line by placing the heel of one foot directly in front of the toes of the other, as though walking a tightrope. Take 10 slow steps. This challenges your balance system in a way that closely mirrors the demands of everyday walking.
Weight Shifts with Reach
Standing with feet hip-width apart near a counter, shift your weight onto one leg and slowly reach the opposite arm forward, to the side, and diagonally, as though reaching for objects on a shelf. This trains your body to maintain stability while your center of gravity moves — exactly the skill that prevents a stumble from turning into a fall.
Gentle Upper Body and Shoulder Mobility Routine
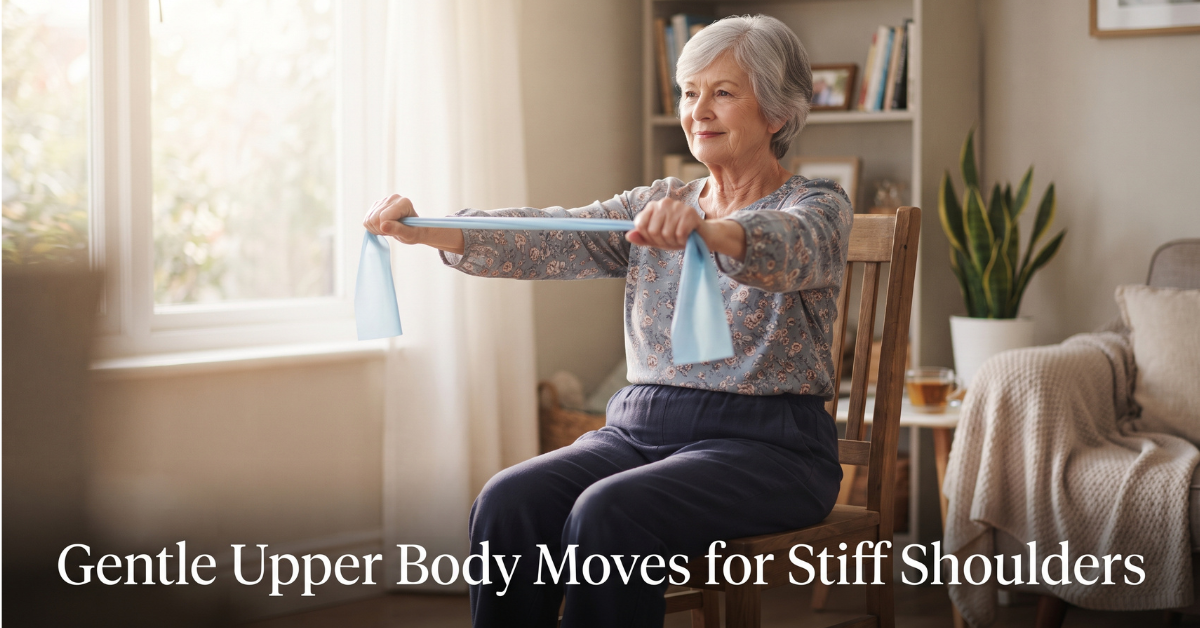
Shoulder stiffness can make everyday tasks like reaching into a cupboard or putting on a jacket surprisingly difficult. These movements restore mobility and build gentle strength through the shoulders, upper back, and arms.
Seated Resistance Band Rows
Sit tall, loop a light resistance band around a sturdy anchor point like a doorknob or table leg, and hold one end in each hand with arms extended. Pull your elbows back, squeezing your shoulder blades together, then release slowly. Perform 10 to 12 repetitions. This strengthens the postural muscles of the upper back, which often weaken with age and contribute to rounded shoulders and neck discomfort.
Wall Angels
Standing with your back against a wall, feet a few inches away from it, press your lower back gently into the wall. Raise your arms to shoulder height with elbows bent, like a goalpost shape, keeping the backs of your hands against the wall as much as possible. Slowly slide your arms upward and back down, 8 to 10 times. This is exceptional for restoring shoulder mobility lost to years of forward-hunched posture.
Cross-Body Arm Stretch
Bring one arm across your chest at shoulder height, using your other hand to gently support it just above the elbow. Hold for 20 to 30 seconds, feeling a mild stretch across the back of the shoulder, then switch sides. This is particularly helpful before or after any activity involving reaching or lifting.
Tailoring the Routine: Modifications for Specific Joints
Not all joint pain is the same, and it helps to know which exercises deserve extra attention — or extra caution — based on where you feel discomfort most.
If Your Knees Are the Main Concern
Prioritize the seated leg extensions and sit-to-stand exercises, as these directly strengthen the quadriceps that stabilize the kneecap. Avoid deep knee bends beyond a comfortable, shallow range, and if the sit-to-stand feels too demanding at first, try it from a slightly higher seat, such as a chair with a firm cushion added, and gradually lower the seat height as strength improves.
If Your Hips Are the Main Concern
The seated hip abduction and weight-shift-with-reach exercises are particularly valuable, as they target the muscles that stabilize the pelvis during walking. Keep movements within a pain-free range, and avoid crossing one leg tightly over the other, a position that can aggravate certain hip conditions.
If Your Shoulders Are the Main Concern
Focus on the wall angels and cross-body stretch, both of which restore mobility gently. Keep resistance band work light, and never force your arm through a position that produces sharp pain — shoulder joints are more prone than most to injury from moving too far, too fast.
If Your Lower Back Is the Main Concern
Seated marching and standing weight shifts are gentle starting points. Maintain a tall, supported posture throughout every exercise rather than slumping forward, and consider placing a small rolled towel behind your lower back while seated for additional support.
A Sample 4-Week Progression Plan
Structure removes guesswork, and guesswork is often what causes people to quit in the first two weeks. Here is a simple, realistic four-week path from your very first session to a confident, established routine.
Week 1: Foundation
Three sessions this week, each roughly 15 minutes. Complete the full warm-up, followed by just two exercises: seated leg extensions (8 reps per leg) and seated marching as an extra warm-down. The goal this week is simply consistency, not intensity.
Week 2: Building Strength
Three sessions, roughly 20 minutes each. Add the sit-to-stand exercise (6 repetitions) and seated hip abduction (8 repetitions per side) to your existing routine. Notice how the warm-up already feels slightly easier than it did in week one.
Week 3: Adding Balance
Three to four sessions, roughly 25 minutes each. Introduce the single-leg stance and heel-to-toe walk from the balance section. Increase sit-to-stand repetitions to 8 and leg extensions to 10 per leg.
Week 4: Full Routine
Four sessions, roughly 30 minutes each. Combine one leg exercise, one balance exercise, and one upper body exercise into each session, rotating through the full list across the week so that every muscle group is addressed by the week’s end. This is the shape your ongoing routine can take indefinitely, adjusting repetitions upward slowly every two to three weeks as your strength and confidence grow.
Your 4-Step Action Plan: Building a Weekly Routine That Sticks
Knowing the exercises is only half the equation. Turning them into a sustainable habit is where lasting relief actually happens. Follow this simple, step-by-step plan.
Step 1: Start With Just Three Days a Week
Resist the temptation to do everything every day. Research on exercise adherence consistently shows that three well-spaced sessions per week, with rest days in between, produce better long-term results than daily sessions that lead to burnout or overuse soreness. Try Monday, Wednesday, and Friday to begin.
Step 2: Structure Each Session the Same Way
Every session should follow the same simple shape: five minutes of warm-up, fifteen to twenty minutes of the main exercises (choose two to three from the leg, balance, and upper body sections above), and five minutes of gentle stretching to finish. Total time: roughly 25 to 30 minutes.
Step 3: Track Your Progress in a Simple Journal
Keep a small notebook or use a notes app to jot down which exercises you did, how many repetitions, and how your joints felt afterward on a simple scale of 1 to 5. This creates accountability and lets you see patterns over time — for example, noticing that your knee feels noticeably better on weeks when you complete all three sessions.
Step 4: Increase Gradually, Never Suddenly
Once a routine feels comfortably manageable for two full weeks, increase the challenge in only one small way at a time — one or two extra repetitions, five extra seconds of a hold, or one additional exercise. This principle, often called progressive overload, is how you continue to see improvement without risking a setback from doing too much too soon.
Making the Most of Your Medicare Benefits: If you have a Medicare Advantage plan, you may already be receiving a monthly or quarterly OTC (over-the-counter) allowance that can go toward items that support a low-impact workout routine — think resistance bands, supportive footwear, foam padding for your exercise space, or joint-friendly pain relief products — but many members never actually use the full amount because the process feels confusing. MyOTC is a platform designed to help Medicare Advantage members easily browse and use their OTC benefit credits at the pharmacy or on everyday health items, so those benefits do not go to waste. See how to check and use your OTC benefit →
Understanding Your Specific Type of Joint Pain
Not all joint discomfort has the same origin, and understanding your particular situation can help you approach exercise with more confidence rather than uncertainty.
Osteoarthritis
The most common form of joint pain in older adults, osteoarthritis develops as the protective cartilage cushioning the ends of bones gradually wears thin over years of use. It most often affects weight-bearing joints such as the knees and hips, as well as the hands. Osteoarthritis pain typically worsens with activity and improves with rest in its early stages, though paradoxically, long-term inactivity tends to make it worse over time, which is exactly why the low-impact approach in this guide is so widely recommended.
Rheumatoid Arthritis and Other Inflammatory Conditions
Unlike osteoarthritis, rheumatoid arthritis is an autoimmune condition in which the body’s immune system mistakenly attacks the lining of the joints, often causing symmetrical pain, swelling, and stiffness, particularly noticeable in the morning. If you have been diagnosed with rheumatoid arthritis or a similar inflammatory condition, it is especially important to coordinate any exercise routine with your rheumatologist, as your needs around flare management may differ from general osteoarthritis guidance.
General Wear, Old Injuries, and Post-Surgical Stiffness
Many people carry joint discomfort that traces back to a specific old injury, a past surgery, or simply decades of physically demanding work or hobbies. This type of joint pain often responds particularly well to targeted strengthening, since the underlying issue is frequently related to muscular imbalance or weakness that developed around the original injury site, rather than a progressive degenerative process.
Whatever the underlying cause, the principle remains consistent: appropriately gentle, progressive movement supports joint health far more reliably than avoidance, and understanding your specific type of joint pain simply helps you and your doctor fine-tune the details.
Nutrition and Recovery Support for Joint Health
Exercise is one half of the equation for joint health; what you feed your body is the other. While no food or supplement can reverse existing joint damage, a nutrient-supportive diet can meaningfully influence inflammation levels and the raw materials your body uses to maintain healthy bone and cartilage.
Calcium and Vitamin D: The Foundation of Bone Support
Strong bones provide the stable base your joints depend on. As we age, calcium absorption naturally becomes less efficient, and Vitamin D — which is essential for that absorption — is harder to generate from sunlight alone. Pairing a calcium-rich diet (leafy greens, dairy or fortified alternatives, and almonds) with adequate Vitamin D intake is one of the most well-established nutritional strategies for supporting long-term bone density.
Anti-Inflammatory Foods
Diets rich in omega-3 fatty acids (found in fatty fish, walnuts, and flaxseed), colorful vegetables, and olive oil have been associated with lower markers of systemic inflammation, which may translate into less joint stiffness over time. Reducing highly processed foods and added sugars is equally important, as these have been linked to increased inflammatory activity in the body.
Hydration and Joint Lubrication
Cartilage itself is composed largely of water, and staying well hydrated supports its cushioning properties. Aim for consistent water intake throughout the day rather than large amounts at once, and reduce this general guidance based on any fluid restrictions your doctor has given you.
Protein for Muscle Maintenance
Muscle naturally becomes harder to build and easier to lose with age, a process sometimes called sarcopenia. Since strong muscles are exactly what protect your joints, adequate protein intake spread across meals — from sources like eggs, fish, poultry, beans, and Greek yogurt — supports the muscle-building work your exercise routine is doing. Many older adults benefit from slightly higher protein intake than younger adults, so this is a worthwhile topic to raise with your doctor or a registered dietitian, particularly if you are increasing your activity level.
Timing Your Meals Around Exercise
A light snack containing some protein and carbohydrate, such as a small handful of nuts with a piece of fruit, about 30 to 60 minutes before your session can help ensure you have steady energy throughout your routine, particularly if you tend to exercise in the morning before a full meal. Avoid exercising on a completely empty stomach if you notice light-headedness during activity, and always mention any dizziness to your doctor.
A Plant-Based Option for Bone and Joint Support: Many members of our community look for a calcium source that also supports joint mobility and heart health in one simple daily tablet. New Chapter’s Plant Calcium Bone Strength combines clinical-strength plant-sourced calcium with Vitamin D3 for absorption, Vitamin K2 to help direct calcium toward the bones rather than the arteries, and joint-function support, all in an easy-to-swallow slim tablet. As always, speak with your doctor before adding any new supplement, especially if you take blood thinners or have a history of kidney stones.
Sleep and Joint Recovery
It is easy to overlook, but sleep is when much of your body’s repair work happens, including the low-grade inflammatory processes tied to joint discomfort. Poor or insufficient sleep has been associated with heightened pain sensitivity the following day, creating yet another cycle worth interrupting. If joint discomfort disrupts your sleep, experiment with a small pillow placed between the knees while side-sleeping, or beneath the knees while sleeping on your back, to reduce pressure on the hips and lower back overnight.
Weight Management and Joint Load
This is a sensitive topic, and it is mentioned here only because the mechanics are worth understanding, not as a judgment. Every pound of body weight translates into several additional pounds of force through the knee joint with each step. This means that even modest, sustainable changes in body weight, achieved gradually through the kind of gentle activity and balanced nutrition described in this guide, can meaningfully reduce the daily mechanical stress placed on weight-bearing joints. This is never about appearance — it is purely about reducing the physical load your knees and hips carry through an ordinary day.
Building a Support Network Around Your Routine
Exercise habits that last are rarely maintained through willpower alone. They are held up by small structures of support around them. Consider these approaches as you build your own.
Tell Someone Your Plan
Simply telling a spouse, adult child, or close friend “I’m doing my chair exercises Monday, Wednesday, and Friday mornings” creates a small but meaningful sense of accountability. Many people find that a brief text message after each session — “Done for today!” — to a family member becomes a rewarding part of the ritual itself.
Join or Start a Small Group
Whether it is a neighbor who also wants to move more, a local senior center class, or an informal video call with a sibling doing their own routine in another city, shared accountability multiplies motivation. You do not need to perform the same exercises together — simply checking in on progress is often enough.
Revisit Your “Why” Regularly
On days when motivation is low, it helps to return to the specific, personal reason you began. Perhaps it is being able to get down on the floor and back up to play with a grandchild, or walking a favorite trail without needing to stop every few minutes. Write this reason down and keep it somewhere visible, such as taped to the chair you use for your routine.
Staying Motivated: Consistency Over Intensity
The single biggest predictor of success with any home workout routine is not how hard you push in any one session, but whether you keep showing up week after week. Motivation naturally rises and falls, so it helps to build systems that do not depend on motivation alone.
Consider pairing your workout time with an existing habit, such as right after your morning coffee or right before your favorite afternoon show. Enlist a friend, neighbor, or family member as an accountability partner, even if they are not doing the exact same routine. Celebrate small wins out loud — the day you go from needing both hands on the chair to just one for your sit-to-stand exercise is genuinely worth celebrating.
It is also worth acknowledging that mental clarity and focus play a real role in staying consistent with any new habit, including exercise. Many of us have had the frustrating experience of misplacing our keys mid-thought or forgetting why we walked into a room — small moments that can chip away at our confidence in tackling new routines.
Support for a Sharper, Clearer Mind: Ever pause mid-sentence because a name just would not come to you, or forget what you walked into the room to do? You are not alone, and it does not have to be your new normal. CogniFort+ is formulated with an advanced Brain Signal Support approach designed to support three key areas of brain health: Sharp Memory, so you don’t miss the moments that matter; Clear Focus, to help clear away that foggy, hazy feeling; and Nerve Support, to help maintain a strong, healthy neural network. With just two capsules a day, many people look to CogniFort+ as part of their daily wellness routine to help feel more mentally present. Learn more about CogniFort+ →
Adapting Your Routine Through the Seasons
Joint pain is often surprisingly weather-sensitive, and many people notice their knees or hips feeling stiffer during colder, damper months. While researchers still debate the exact mechanism, changes in barometric pressure and colder temperatures causing tissues around the joint to contract slightly are among the leading theories. Rather than fighting this pattern, it helps to adjust your routine seasonally.
Cooler Months
Extend your warm-up by an extra two to three minutes during colder weather, since joints genuinely take longer to loosen when temperatures drop. Consider layering with warm, comfortable clothing during your session, and if your home tends to run cold in the morning, move your routine to a warmer part of the day, such as after lunch, when your body’s natural temperature and the room itself are both a little higher.
Warmer Months
Heat can actually be very soothing for stiff joints, but it also increases the risk of dehydration during activity. Keep water within arm’s reach throughout your session, and if your living space becomes very warm in the afternoon, an earlier morning session before the heat builds is often more comfortable.
During Travel or Disrupted Routines
Holidays, travel, or houseguests often interrupt a good routine, and that is entirely normal. Rather than aiming for perfection, aim for a shortened five-minute version of your warm-up plus two favorite exercises, even in a hotel room or a relative’s living room. Maintaining the habit in miniature is far more valuable than abandoning it entirely and having to rebuild from zero afterward.
What Consistency Actually Looks Like: A Realistic Picture
It is worth painting an honest picture of what a successful routine tends to look like in practice, because it rarely resembles the dramatic before-and-after stories often shown in advertisements. Members of our own SeniorJourney community frequently describe a pattern much like this one.
The first week feels a little awkward. The movements are unfamiliar, ten repetitions of a seated leg extension feels oddly effortful, and it is easy to wonder whether any of this is really doing anything. By the second week, something subtle shifts — perhaps standing up from the car feels marginally less effortful, or a full night’s sleep feels slightly more restful. By the fourth week, many people notice they have stopped consciously thinking about “protecting” a joint during ordinary movements like reaching for a high shelf or navigating a curb. By two to three months in, the routine itself has often become simply part of the week, no more remarkable than brushing one’s teeth, and the earlier discomfort that once shaped daily decisions has meaningfully receded into the background. This is the quiet, cumulative payoff that consistent low impact home workouts for joint pain seniors deliver over time.
This gradual, almost unremarkable trajectory is, in fact, the sign of something working well. Chronic joint discomfort built up slowly, and its improvement tends to unfold on a similarly gentle timeline. Patience, applied consistently, is the real engine behind every success story in this space.
There will also be setback weeks — a busy schedule, an illness, a stretch of bad weather that saps motivation — and these are a completely normal part of the process rather than evidence of failure. The people who see the best long-term results are rarely the ones who never miss a session; they are the ones who simply return to the routine the following week without treating the gap as a reason to give up entirely.
Safety Tips: When to Check With Your Doctor

Even the gentlest routine deserves respect for your body’s signals. Reach out to your doctor before continuing your program if you notice any of the following:
- Joint pain that is sharp, sudden, or significantly worse than your usual baseline discomfort
- Visible swelling, redness, or warmth around a joint after exercise
- Pain that persists or worsens more than two hours after your session, or that wakes you at night
- Dizziness, chest discomfort, or unusual shortness of breath during activity
- A new or worsening limp, or a feeling of instability that was not present before
None of these signs mean you have failed, or that exercise is “not for you.” They simply mean your program needs adjustment, and a physical therapist or doctor is the right partner to help you fine-tune it safely.
It can also help to keep a short list of questions ready for your next appointment, so nothing gets lost in the shuffle of a busy visit. Consider asking: “Based on my specific joint condition, are there any of these movements I should avoid or modify?” “Would a referral to a physical therapist be useful for a few sessions of hands-on guidance?” and “Are there any of my current medications that might affect how my body responds to increased activity?” Bringing a written list like this transforms a general checkup into a focused, productive conversation about your exercise goals.
Making Your Whole Home More Joint-Friendly
A structured workout routine is powerful, but it works best alongside small adjustments to your everyday environment that reduce unnecessary strain on your joints throughout the rest of the day.
Seating Height Matters More Than You Think
Chairs, sofas, and even toilet seats that sit too low force your knees and hips through a much larger range of motion every time you sit or stand, repeated dozens of times a day. Firm cushions can raise low seating to a more joint-friendly height, and raised toilet seats, widely available and inexpensive, meaningfully reduce strain during one of the most repeated movements of the day.
Reduce Unnecessary Bending and Kneeling
Long-handled tools for gardening, cleaning, or reaching low shelves can eliminate a significant amount of daily kneeling and deep bending. In the kitchen, storing frequently used items at waist-to-shoulder height rather than in low cabinets removes another source of repeated joint stress that adds up unnoticed across a week.
Supportive, Well-Fitted Footwear
Worn-out or unsupportive shoes change the way force travels up through your ankles, knees, and hips with every step. A shoe with good arch support, a slightly cushioned sole, and a secure fit (rather than loose slippers) can measurably reduce daily joint strain, even for simple activities like walking around the house.
Grab Bars and Handrails
Installing a grab bar near the shower or tub, and ensuring handrails are secure on any staircase, does more than prevent falls in a worst-case scenario. Simply knowing that support is available if needed often reduces the subtle muscle guarding and tension that comes from moving cautiously through fear, which can itself contribute to stiffness over time.
Stay Consistent, Stay Pain-Free: Your Next Step
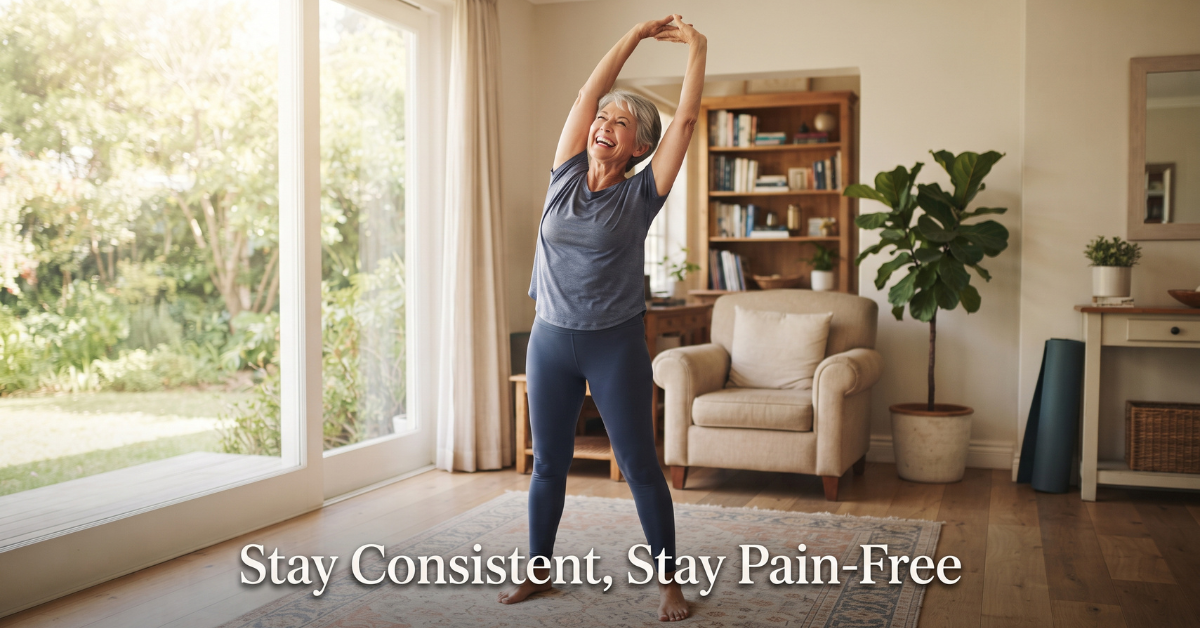
Joint pain does not have to mean a smaller life. It does not mean giving up the garden, the grandchildren’s playroom floor, or the simple pleasure of a walk without worry. It means learning to move with intention rather than fear, strengthening the muscles that protect your joints, and giving your body the consistent, gentle care it deserves.
Start small this week. Choose just three exercises from this guide, commit to three sessions, and notice how you feel by the end of it. Progress in joint health is rarely dramatic overnight — it is quiet, steady, and cumulative, the same way the discomfort built up slowly over years. Give yourself that same patience in reverse.
You deserve to move through your days with confidence, comfort, and strength. If you take just one thing from this guide, let it be this: consistent, low impact home workouts for joint pain seniors are one of the safest, most effective tools available for reclaiming that confidence. We are cheering you on every step of the way.
Before you close this guide, take one concrete action: put your first session on the calendar right now, today, for a specific day and time this week. Intentions that stay abstract rarely turn into habits, but a specific appointment with yourself — Tuesday at 9 a.m., chair set up by the window — very often does. You have everything you need already: a chair, a little bit of floor space, and the willingness to begin gently. That is genuinely enough, and every strong, steady stride you take from here forward starts with that one small appointment you just made with yourself.
Want to follow along with video demonstrations of these exact exercises? Visit our friends at the SeoulcastUSA YouTube channel for step-by-step video guides designed especially for the 50+ community. Warm, clear, and always at your own pace — we would love to see you there.
### Recommended Tags
low impact workouts for seniors, joint pain exercises, senior fitness at home, arthritis exercise routine, healthy aging
💡 Frequently Asked Questions (FAQ)
Q1: Is it safe to exercise every day if I have joint pain?
For most seniors with joint pain, starting with three non-consecutive days per week of low impact home workouts for joint pain seniors is safer and more sustainable than daily exercise. Rest days give muscles and joints time to recover and actually adapt and strengthen. As your body adjusts over several weeks, some people gradually add a fourth day, but this should always be based on how your joints respond, ideally with guidance from a doctor or physical therapist.
Q2: What is the difference between “good” muscle soreness and “bad” joint pain that means I should stop?
Good soreness typically feels like a dull, general ache in the muscle belly, appears within a day of exercise, and improves with gentle movement. Concerning pain tends to be sharp, localized directly in the joint, appears suddenly during the activity itself, or is accompanied by swelling, warmth, or a feeling of instability. When in doubt, stop the activity and check in with a healthcare provider.
Q3: Can low-impact exercise actually help with osteoarthritis, or is it just about staying active in general?
Low-impact exercise offers specific, targeted benefits for osteoarthritis. Strengthening the muscles around an affected joint reduces the mechanical load the joint itself has to bear, gentle movement helps circulate synovial fluid that lubricates the joint, and consistent activity has been shown in numerous studies to reduce pain scores and improve function in people with knee and hip osteoarthritis, often comparably to certain medications but without the associated side effects.
Q4: I have not exercised in years. Where should I actually start?
Begin with the 5-minute warm-up routine on its own for the first few days, without adding the main exercises yet. Once that feels comfortable, add just two or three chair-based exercises from the leg strengthening section, performing fewer repetitions than recommended (perhaps 5 instead of 10) for your first one to two weeks. Gradually build from there. Starting smaller than you think you need to is almost always the right call.
Q5: Do I need any special equipment to do these workouts at home?
No special equipment is required to begin. A sturdy, armless chair and a clear, safe space are enough for every exercise in this guide. Optional additions like a light resistance band or a one-to-two-pound ankle weight can add variety and progression later on, but they are never necessary to get started or to see real benefit.
Q6: Will these exercises help with joint pain in more than one area, like both my knees and my shoulders?
Yes. This guide is intentionally structured around the whole body rather than a single joint, because most people managing joint discomfort experience it in more than one location over time, and overall strength, posture, and balance are interconnected. Following the full weekly plan, rather than isolating a single body part, tends to produce the most well-rounded and lasting results.
Q7: How long before I might notice a real difference in how my joints feel?
Individual timelines vary, but many people following a consistent, well-structured program of low impact home workouts for joint pain seniors report noticing improved ease of movement, such as standing up from a chair more comfortably, within two to four weeks. More significant improvements in overall pain and function are commonly reported closer to the eight to twelve week mark, which aligns with findings from broader research on structured low-impact exercise programs for joint health.
🌿 Weekly wellness, health & beauty insights — straight to your inbox
Free subscription · Cancel anytime